Saturday, June 19, 2010

My First Wedding


I photographed my first wedding over Memorial Day weekend! What did you think I was talking about?! I don't know why people have trouble understanding me...

Anyway, outdoor wedding in Washington? Were you in the area for Memorial Day? Do you remember what the weather was like. R-A-I-N. The weather made an official person to hold an umbrella over my camera a necessity, and an evening reception indoors led to some challenging lighting situations. But, thanks to Photoshop, I still came out with some good shots...


Silly shots are the best. The bride and her siblings...


If you haven't noticed by now, the whole wedding party wore cowboy boots...


The bride found hers used, and the owner of the shop said they'd had them for like 7 years! They were in her size and even super narrow! So sweet!


I now pronounce you man and wife, now get to the dry reception hall!


The bride didn't want the groom to see her before the ceremony, so we got the whole wedding party all in one place at the reception...


Wow! Congratulations Russel and Karmin! It was a beautiful wedding and I wish you all the best! I'll have all the pictures done very soon!


Oh, yeah, about the food. Mom and I did the cupcakes...


I'm jealous, I think hers turned out better than mine. Hers are the chocolate.

And, fried chicken at a wedding?


I got ridiculed by a guest for taking this picture, but, people - fried chicken! Fried chicken at a wedding is the best idea ever! Too bad I didn't get a piece!

Wednesday, June 16, 2010

Mexican Cooking - Tamales


I hostessed a second Mexican cooking lesson, and am finally blogging about it! At the first lesson, when I asked what we should make next time, I got mixed answers. Everyone had a different vote... until a second person voted for Tamales - Serena, I think that was you! I was not excited, since I don't like tamales. But when I told that to Sandy the Chef, she said, "But you haven't tried mine!" So I gave in. And boy am I glad I did!

I am not posting this in my Tastebook or TastyKitchen because I am never making it again without Sandy present, and I am skeptical that any of you will, either. It is quite the process. Even Sandy says she only makes them twice a year - on Thanksgiving and on her daughter's birthday. So if any of you are brave enough to tackle them on your own, I give you a major pat on the back! Anyway, I will chronicle what we did and try to be detailed in case any of you reading are overachievers and want to make them. By the way, we were able to find everything we needed at Fred Meyer.

First off, we put a big, fatty cut of meat (Sandy says any cut with fat will do) in a large pot, added 2 TBSP salt, covered the meat with water and boiled rapidly, covered, for 2-3 hours.

Then we all chopped and chopped and whipped up some pico de gallo and guacamole to snack on, which I detailed last time. Then we got to work on the rest of the ingredients for the tamales.

First we put a bag of dried Guajillo chili pods (you can also use NM chili pods or CA chili pods) and two large fresh Poblano peppers in the oven, right on the rack at 350 degrees for 5-10 minutes (don't let them get black like we did!).

While the peppers cooled, we put a diced 1/2 onion in a hot skillet with some bacon grease for 1-2 minutes, then added 8-9 julienne sliced jalapeƱos with seeds and let that cook for 1-2 minutes. Then we added 3-4 diced roma tomatoes (more if you don't want it spicy). We covered it and let it cook for about 15 minutes. Then we set this aside.

After our roasted peppers cooled, we broke off the stems, broke the peppers in half and dumped out the seeds. Then we boiled them until soft. Then we took them out of the water (reserve it), and put them in a food processor with 1 clove garlic, 1/2 tsp cumin and 2 tsp salt, and pureed well, adding a little water from the pot until the consistency was a little thinner than ketchup.

Updated measurements: Next we added 7 tsp baking powder to a whole bag (5 lb) of corn masa mix, along with 4 2/3 cup shortening or bacon grease (we used about half and half), along with 10 cups hot broth from the boiled meat (add 2-4 cups at a time, gradually mixing and watch for the right consistency as shown below). 

Then dear Sandy mixed and mixed and mixed by hand...


till it didn't stick to her hands anymore.


This is much like cutting butter into a pie crust. I think Sandy was on the floor mixing with her hands for nearly 20 minutes!

By now, the meat was fork tender and tore apart easily, so we took it out and allowed it to cool for 10-15 minutes before pulling off fat and shredding it with fork or fingers.


Now to assemble the tamales. Sandy showed us how to put a handful sized ball of masa and spread it out on the corn husk toward the wide end, then add meat and/or veggies depending on your preference, add a bit of the pepper sauce, and fold 'er up! We folded both sides in, then the narrow bottom up toward the top, leaving the wide top end open. Here it is in pictures...


Then they all went in the pot, brick style, to steam for one hour!


And then, when you start to smell them...


You whip one out and chow down! Oh, maybe that was just me... They were amazing and so was the company!


Thanks everyone who showed up to take part, and thanks Sandy!!

You can also read Leah's post about it here.

What should we learn to make next time???

Saturday, June 12, 2010

Progress - Big Boy Accents


You might remember Mark's dresser after I added a canvas print of one of my photographs and some DIY alphabet art...


I liked the art but was not digging the flat, lifeless display. I worked on that this week and came up with something much better...


Ahh... much more complete... from A to Z! Sorry. Yes, I ditched my alphabet DIY art, but it will be used somewhere else in the room, for sure.

Okay, Mark just walked up to me and said, "You are showing them a picture of my bedroom with all the books on the shelf? That's funny." Well I thought it was a blog-worthy little arrangement! What a little punk.

Anyway, here we have one of the best additions, the pine cones...


They are giant Sugar Pine cones from a road trip the husb took a few months back. Mark likes them, he calls them 'mama pine cones' because they are bigger than all my others. They seemed an appropriate avenue to bring in some texture next to the woods print.

Then we have the new alphabet book ends to keep mark's boy books at the ready in his room...


And they are very appropriate since he has moved on from the uppercase alphabet to the lowercase. I like the black - it repeats the black from the bedding and balances out the room a little.

And of course I had to keep the globe because this is the extent of my world geography skills...


I will study it right along with him as we homeschool!

The only thing I am not sure of is this little item...


I made it to hold artwork, but I never put any in it and it seems like it is in an awkward spot...


There is not really anywhere else logical to put it in the room, due to the dormers, so it might just have to stay there.

Well that's all for now folks! But the MIL's living room and bedroom are almost complete! Stay tuned for those reveals coming soon!

Thursday, June 10, 2010

Progress - Master Bedroom Decor ala Farm Chicks


Does that even make sense? I should know what 'ala' means because I took Spanish, but I don't recall. Don't worry, I am pretty much done with Farm Chicks posts; it is just that this progress is due to those purchases.

Okay, this mirror was just fine with me - I even thought it was really nice with the real wood frame that matched the cedar wall and cedar-toned dressers in our master bedroom...


that is, until I saw this blue-gray-turquoise treasure hiding in an adorable little booth that I should have remembered and linked you to...


I had initially wanted to use it at my MIL's, but it didn't jive with anything I had going on at her house, so I snapped this picture to remind me that I loved it and to think about it. Well I thought about it, and remembered I had been looking for a mirror with this kind of detail for my bedroom...


my bedroom which also happens to have a scheme that does jive with the muted turquoise of this beauty! Since it is not quite full length, I thought it might look awkward, but Leah supported me and convinced me it would be okay, so...


Good call, Leah! What a difference! That's what some style can do for you! I am slowly learning not to always stick with safe, boring and proper. I was worried that this mirror was from the wrong era for this room, but I do believe I am in love. That corner is much better now.

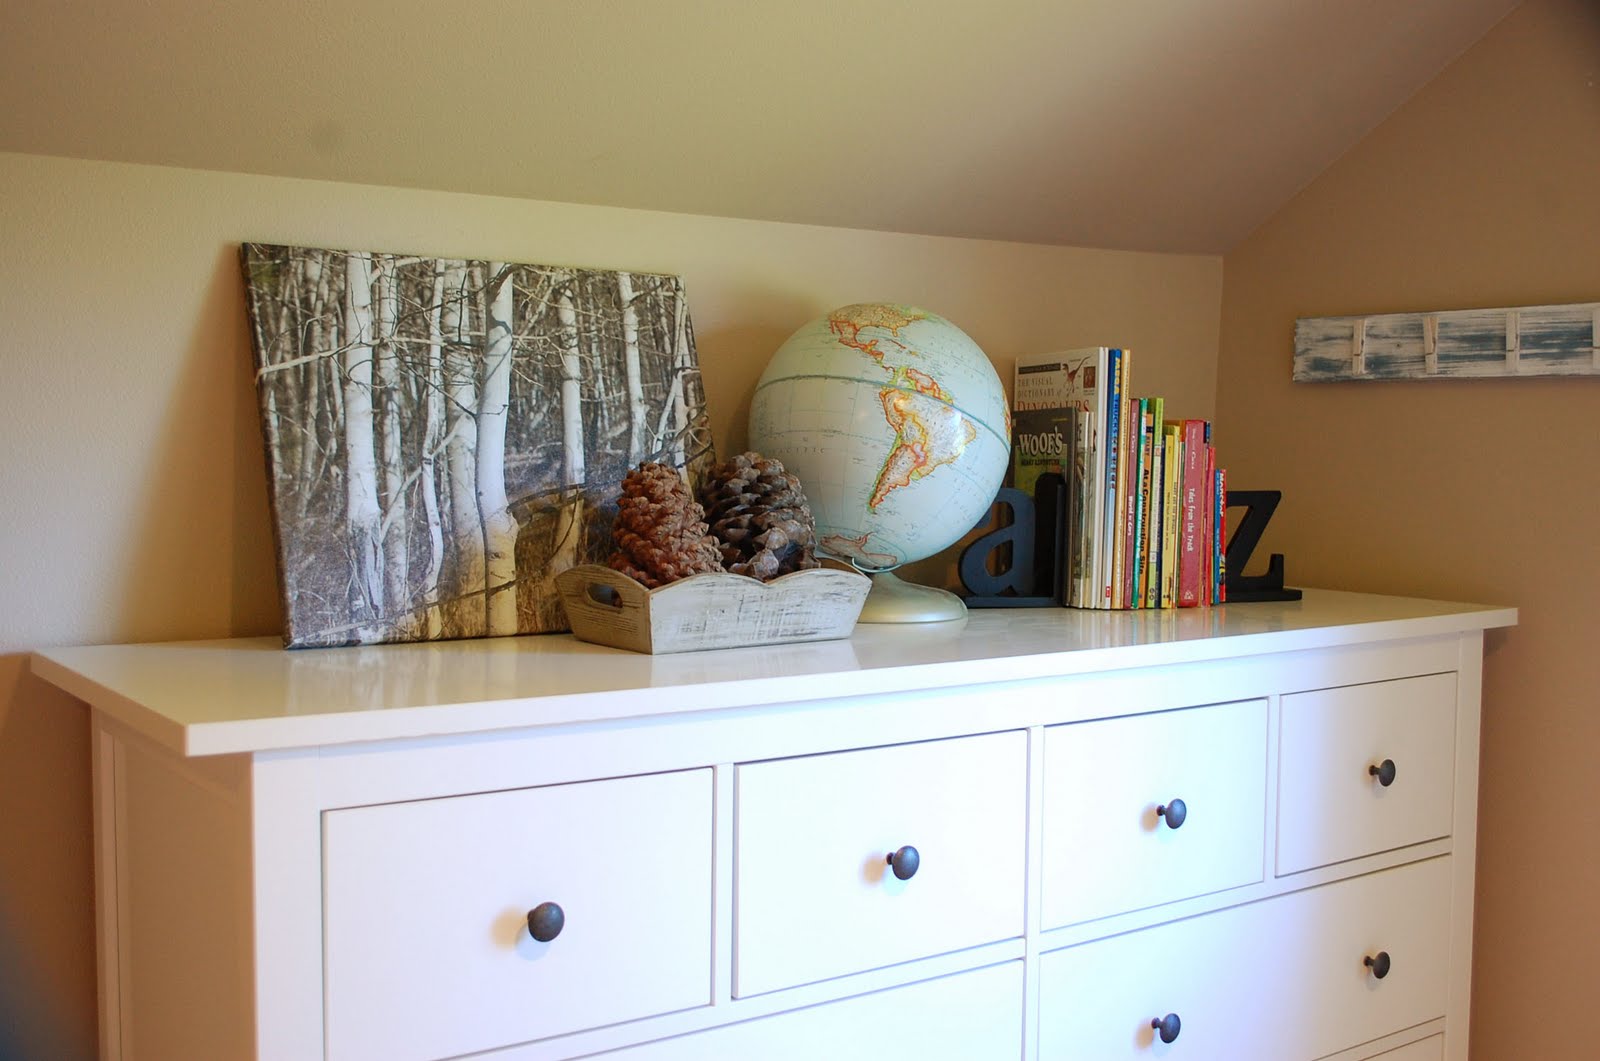
Next, we move on another big step in the master bedroom; the cluttered book shelves...


This was really bothering me lately, so I put another of my Farm Chicks finds to good use here. First, I took away the filing shelf/baskets thingy that always looks out of place no matter where I put it. Then I took the books off the top shelf and decided the top shelf needed to be dedicated to one thing and one thing only, in order for the whole arrangement to look less cluttered. Which brought me to these...


I had one of these jars already, with my husband's late father's marble collection from when he was a boy safely housed inside for display. More of these jars had been number one on my list to hunt down at the sale, and there were plenty on hand at several booths. I think they work nicely on the shelf...


I love that the jars help me with my small-house-no-storage issues, housing collections, receipts and business cards that I don't have another logical place for. And the blue jars are perfect with the color scheme. That makes me feel much better. And Mom, you might finally get the filing thingy if you still want it! But where am I gonna stick all my files! Argh!

This guy is still looking for his permanent home...


Ironically, while decorating my MIL's office (I need to bring you that 'reveal'), I put a ceramic birdie in a nest under a glass cloche. I thought it was whimsical and charming, but the MIL said she was sad because he seemed like he was suffocating. I thought that was the silliest thing... until... I tried to put Mr. Fergie under that large cloche behind him, and I couldn't do it! I'm getting soft! Next I'll be unable to abandon dying houseplants like my mother!